
Automating Application Launch with Task Scheduler
Configure Windows Task Scheduler to launch your application at every Windows startup. It can then return after a scheduled restart or a reboot caused by a crash without waiting for an admin to log in. The screenshots use OmegaManager; use the same steps with your executable.
Use Remote Desktop to connect to the server. Search the Start menu for “Task Scheduler”, open it and configure the tabs below.
Create a Task
Section titled “Create a Task”Add a task with a name you can recognize. On the General tab, choose Run whether user is logged on or not and enable Run with highest privileges, as shown below.
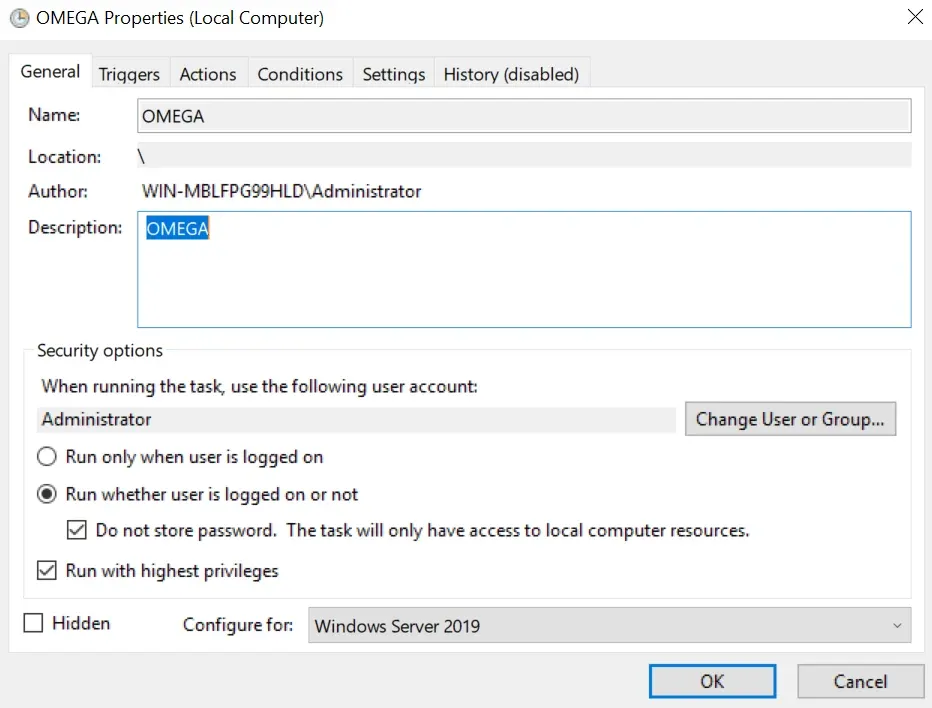 Main Settings.
Create a Trigger
Section titled “Create a Trigger”Add a trigger on the Triggers tab. Set Begin the task to At startup and keep Enabled selected. The trigger runs after any Windows reboot, including a reboot caused by a crash.
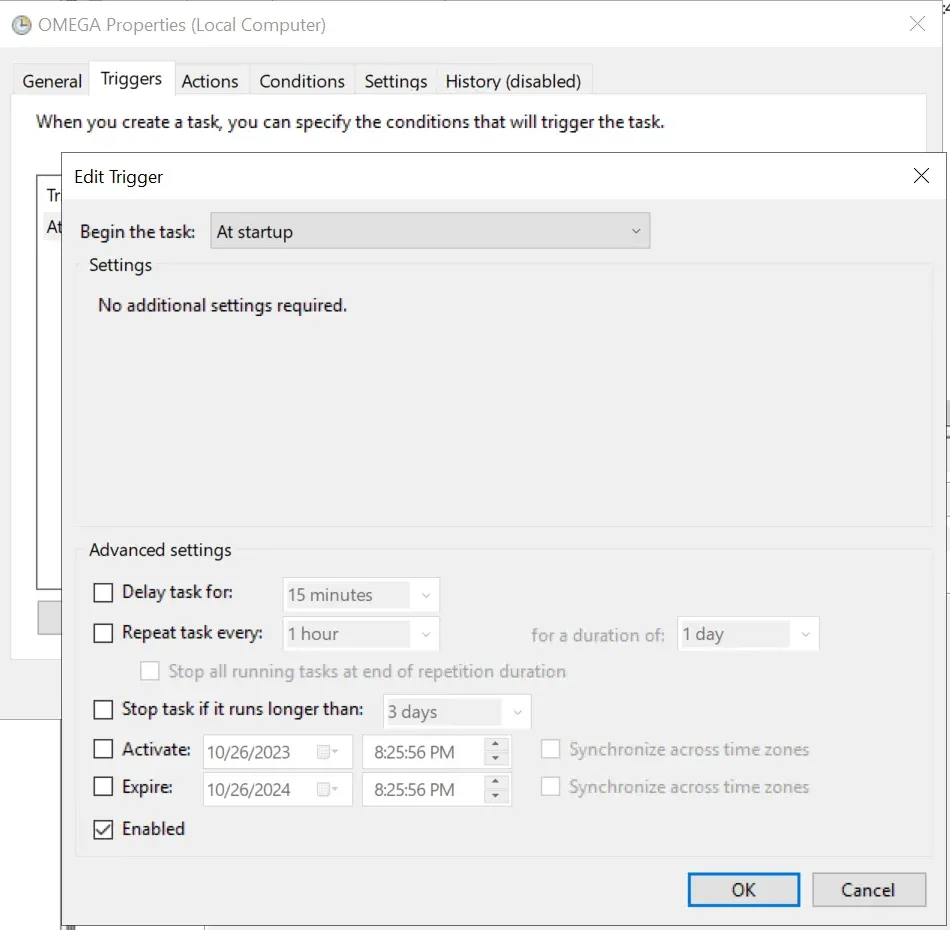 Trigger Settings.
Create an Action
Section titled “Create an Action”Add Start a program on the Actions tab. Set Program/script to the .bat (batch) file you will create in the next step.
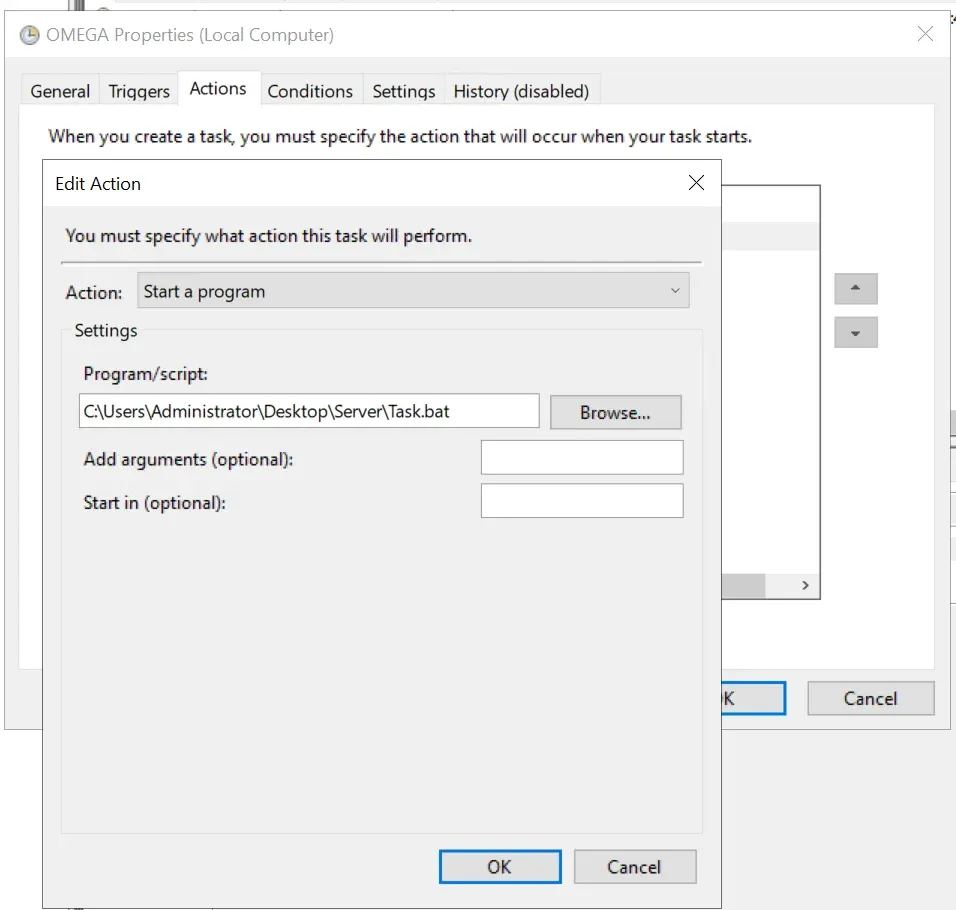 Action Settings.
Batch File
Section titled “Batch File”Create the batch file named in the action, such as Task.bat. Add the commands below, replacing the folder path and executable name with those for your application:
@echo offstart /d "C:\Users\Administrator\Desktop\Server" OmegaManager.exe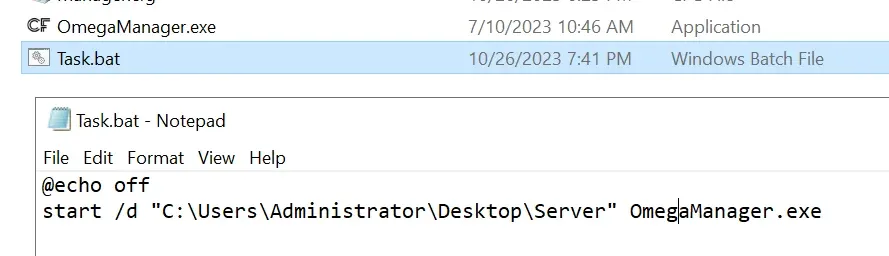 Batch File.
Configure Conditions
Section titled “Configure Conditions”Clear the idle, power and network start conditions on the Conditions tab so they cannot prevent the launch. Keep Wake the computer to run this task selected:
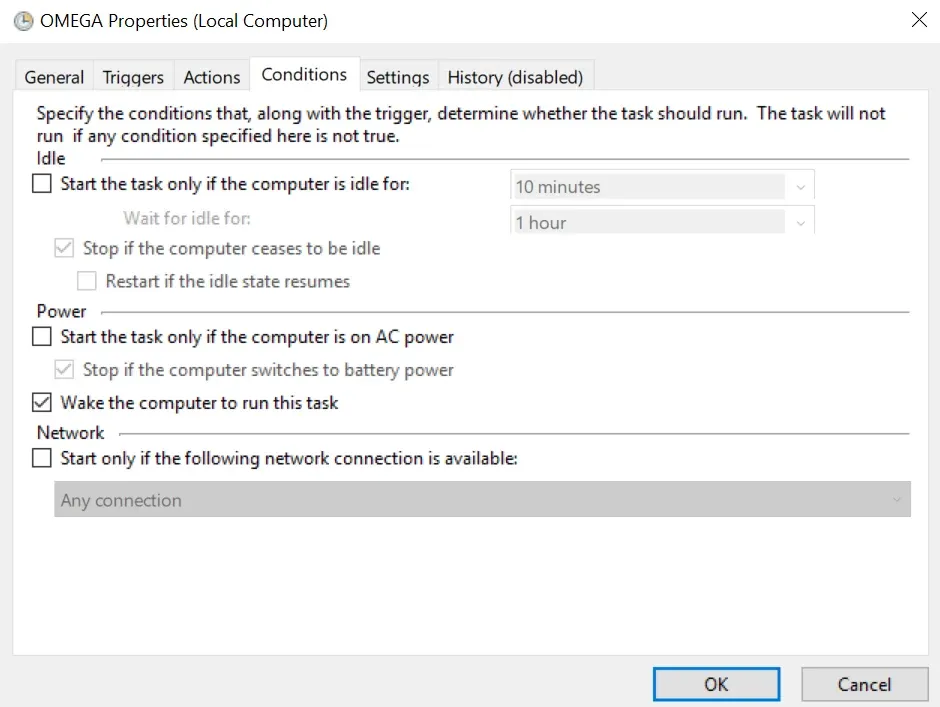 Conditions.
Apply Settings
Section titled “Apply Settings”On the Settings tab, select Allow task to be run on demand and If the running task does not end when requested, force it to stop. Choose Do not start a new instance for an already-running task to prevent a second copy. Save with OK.
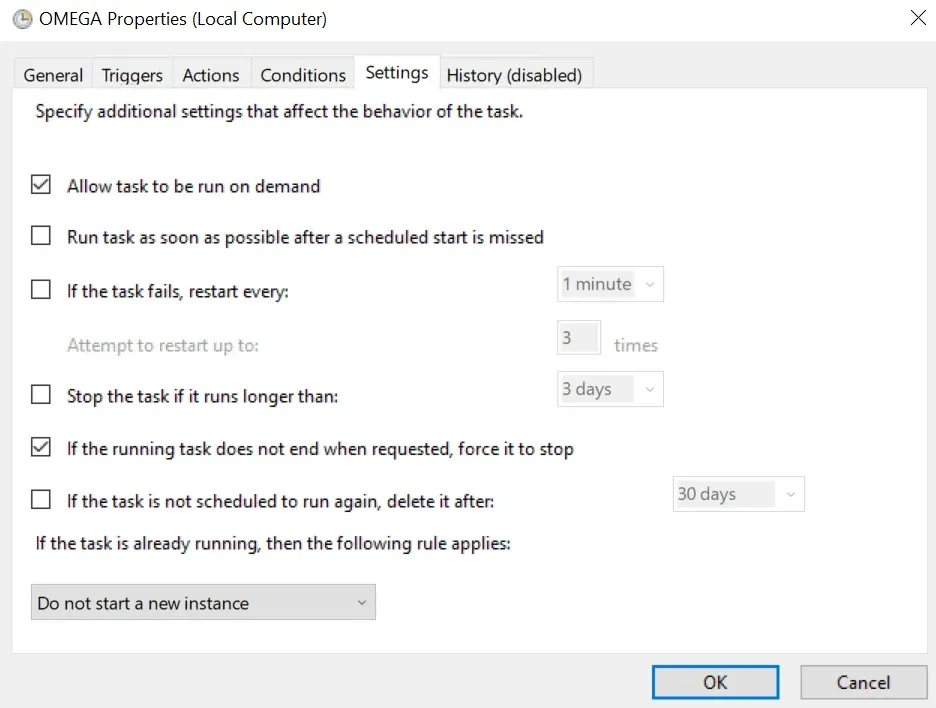 Settings.
The task now launches the application on each Windows startup without admin input. Test it before rebooting: right-click the task and select Run.
Windows may hide console output for an application launched this way. We have not confirmed a reliable workaround using custom arguments, so this guide does not recommend one.